I. Introduction
Have you ever wondered how to simplify delivery management for your online store? The answer could well be Colissimo, and thanks to the hbkcolissimochrono module, integration with Drupal is a breeze. Let's find out how this module can transform your delivery experience.
II. Prerequisites
Before diving into the fascinating world of delivery with Colissimo, make sure your Drupal site is ready for the adventure. With Drupal 9 or 10 and the commerce_shipping module already on board, you're on your way to a smooth delivery experience.
III. Activating the module
Installing the hbkcolissimochrono module is as easy as waving a magic wand. Whether you prefer the traditional method via Composer with composer require habeuk/hbkcolissimochrono or you're a Drush fan, a simple drush command in hbkcolissimochrono -y is all it takes to set sail for successful integration.
IV. Basic configuration
Implementing an effective delivery strategy is crucial to the success of your online store. With the hbkcolissimochrono module, you can configure delivery methods tailored to your customers' specific needs, while complying with Colissimo's rates. In this article, we will focus on a configuration example for Colissimo mainland France. For other services such as Colissimo Overseas, Colissimo International Europe, and Colissimo International World, you can consult the rate tables in the index to adapt your configuration to the specificities of each type of delivery. This will allow you to master the configuration process for a specific case, while having the necessary resources to apply it to other delivery contexts.
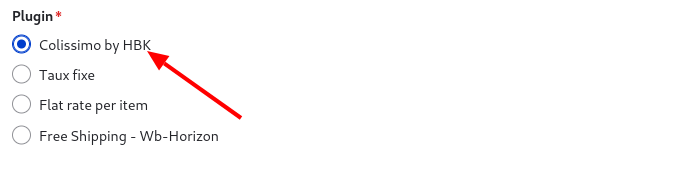
- Choosing the “Colissimo by HBK” plugin : Select “Colissimo by HBK” when adding your delivery method to benefit from optimized integration with Colissimo services.
Default Package Type Selection : Select the package type that will be used by default for shipments, which will determine the available packaging options.

For the Default Package Type Selection, it is important to note that the default value we use is a package measuring 100cm x 25cm x 25cm. This size was chosen because it complies with Colissimo's requirements for standard parcels, where the sum of the three dimensions (length + width + height) must be equal to or less than 150cm, with a maximum length (L) of 100cm. Be sure to configure this default dimension in your system to ensure compliance with Colissimo standards and avoid any additional costs associated with exceeding the permitted dimensions.
- Selecting the Colissimo Shipping Type : Choose the Colissimo service that best suits your needs, whether it's shipping to a pickup point, with a signature for added security, or without a signature for added flexibility.

- Definition of the Delivery Method Label : The label you define will be visible to your customers when they choose their delivery option, so it must be clear and descriptive.

- Maximum Weight Setting : Set the maximum weight a package can have for this shipping method, which will influence pricing options.

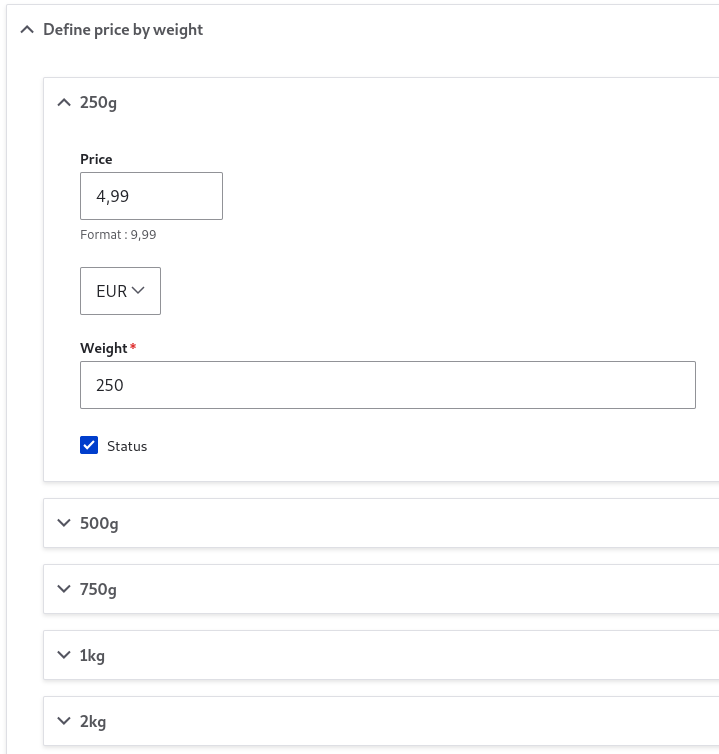
Price by Weight Configuration : In the “Define price by weight” section, you will create a series of price tiers based on weight. For example, the first tier could be from 0g to 250g. Then you would add a second tier for packages weighing more than 250g up to 500g. Each tier defines the shipping cost for its specific weight range. Make sure these tiers are aligned with the maximum allowed weight to avoid any exclusions when saving the settings.
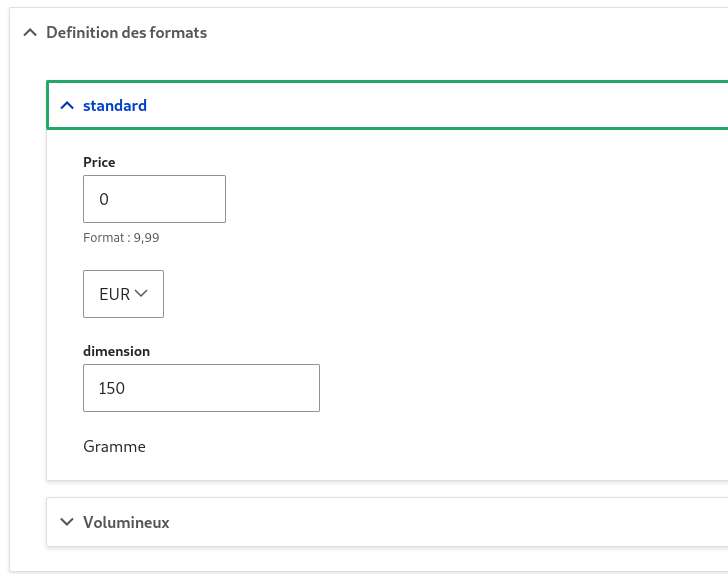
- Defining Parcel Formats : This step is crucial for adjusting delivery costs based on parcel size. Colissimo categorizes parcels into two main formats: standard and bulky. For each format, you must define a surcharge that will be applied in addition to the base rate linked to weight. Standard packages are those whose dimensions (length + width + height) do not exceed a certain threshold, for example 100 cm. Above this threshold, the package is considered bulky and an additional surcharge is applied to account for the space it occupies during transport. You will need to enter this information in the fields provided, specifying the amount to be added for each format and the corresponding dimensions.
Delivery Zoning : Accurately defining delivery zones is key to ensuring that your customers receive their orders efficiently. Here's how to do it step by step:
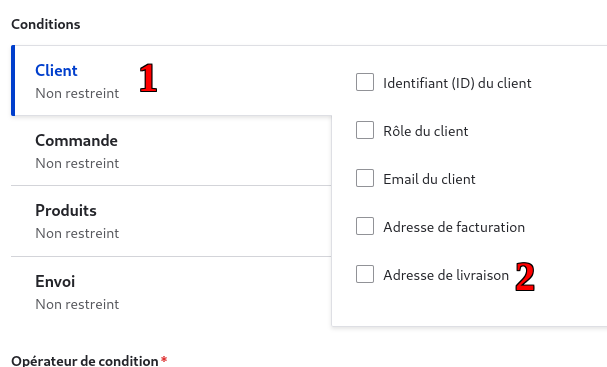
- Go to your delivery method settings and locate the “Customer” tab (1). This is where you will define the delivery criteria based on the customer's address.
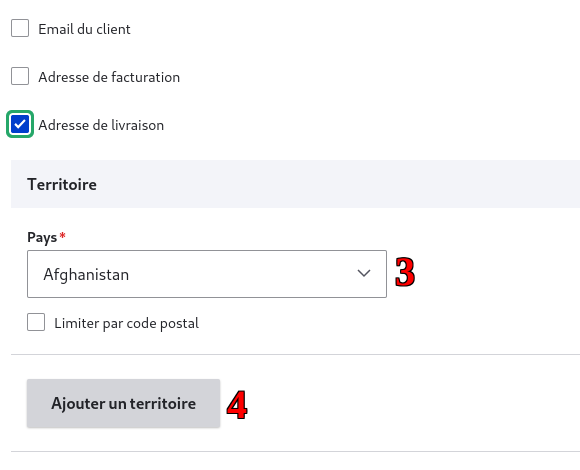
- Find the “Delivery Address” option (2) and check it. This will trigger the display of additional options for defining delivery territories.
- A “Territory” field will appear, allowing you to enter the first country or region for which you want to activate this delivery method. You can also specify postal code ranges to refine the delivery area (3).
- If your delivery method needs to cover multiple territories, click “Add Territory” (4) to configure each additional area. Repeat this process for each country, region, or postal code range you want to include.

Conclusion
You are now ready to embark on the world of delivery with Colissimo and Drupal. With the hbkcolissimochrono module, managing shipments becomes not only easier but also more enjoyable. Ready to offer your customers a flawless delivery experience?