In this tutorial, we will see how to create a Shopify app using the cli Shopify.
Scenario
You want to create an app that appears in the Shopify admin interface in order to offer the best user experience. Your app will be tightly integrated with Shopify and will use familiar user interface components and templates.
What you will learn
Once you have completed this tutorial, you will have done the following:
- Initialized your app in the command line
- Generated a new working directory containing the starter code
- Installed all of your app's dependencies, including Shopify CLI
- Installed your app on a development store
Prerequisites
- You have created a Shopify Partner account and a development store.
- You have installed Node.js 16 or higher.
- You have installed a Node.js package manager: npm, Yarn 1.x or pnpm. (In this tutorial, I will use yarn.)
- You have installed Git 2.28.0 or higher.
- You are using the latest version of Chrome or Firefox.
Step 1: Create a new application
You can create a new Shopify application using an npm, yarn, or pnpm command.
- Navigate to the directory where you want to create your application. Your application will be created in a new subdirectory.
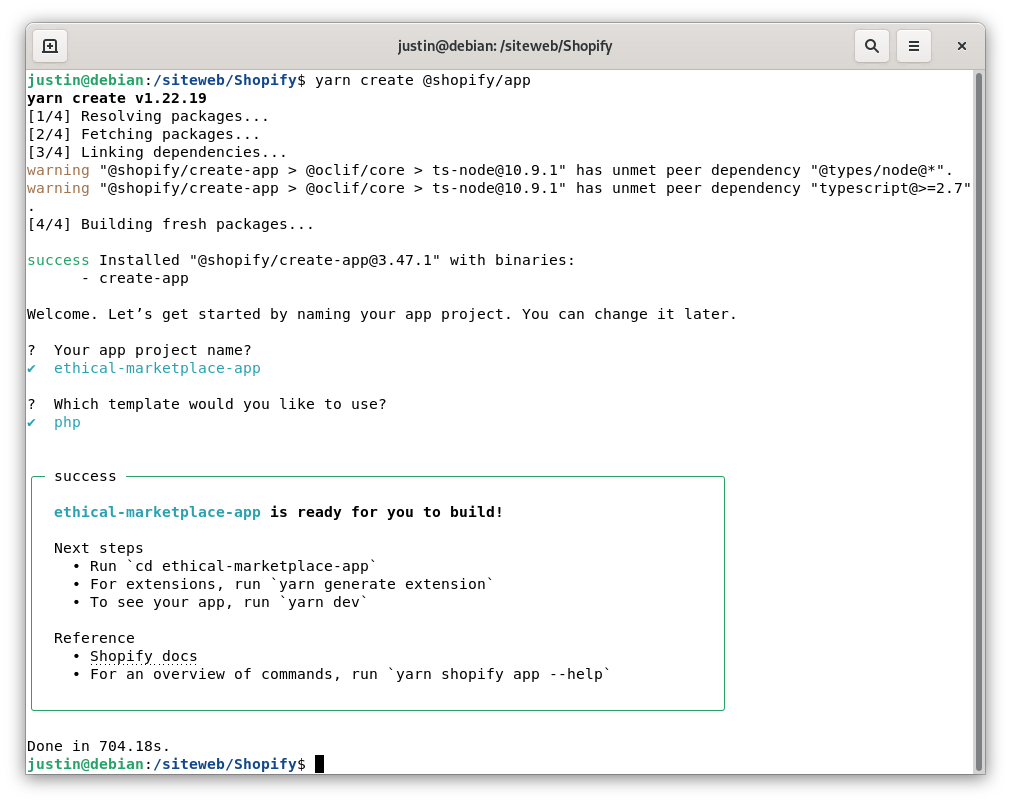
Run the following command to create a new application, then select the d'application template language you want to start with: Node, PHP, or Ruby. Here we will use PHP.
yarn create @shopify/app
A new app is created and Shopify CLI is installed with all the dependencies you need to build Shopify apps. Shopify CLI is also added as a dependency in your app's package.json.
Step 2: Start a local development server
Once your app is created, you can use it by creating the app and starting a local development server.
Shopify CLI uses Cloudflare to create a tunnel that allows you to access your app using a unique HTTPS URL.
Go to your newly created app directory.
Cd mon-app
Configuring the PHP application
Once your application is created, you will be able to run commands on it. However, the CLI will not automatically manage your PHP dependencies, so you will need to follow certain steps to be able to run your application. Here are the typical steps required to configure a Laravel application once it is cloned:
- Start by switching to the web folder:
cd webInstall your dependencies composer:
composer installCreate the .env file:
cp .env.example .env- Start the default SQLite database and add it to your .env file:
touch storage/db.sqlite
NOTE : Once you have created the database file, be sure to update your DB_DATABASE variable in .env because Laravel requires an absolute path to the file.
- Generate an APP_KEY for your application:
php artisan key:generate- Create the necessary Shopify tables in your database:
php artisan migrate
And your Laravel application is ready to go! You can now return to your application's root folder to continue:
cd ..Start your application
yarn devIn some cases, the Cloudflare tunnel may not work. In this case, you can use ngrok.
yarn dev --tunnel ngrok
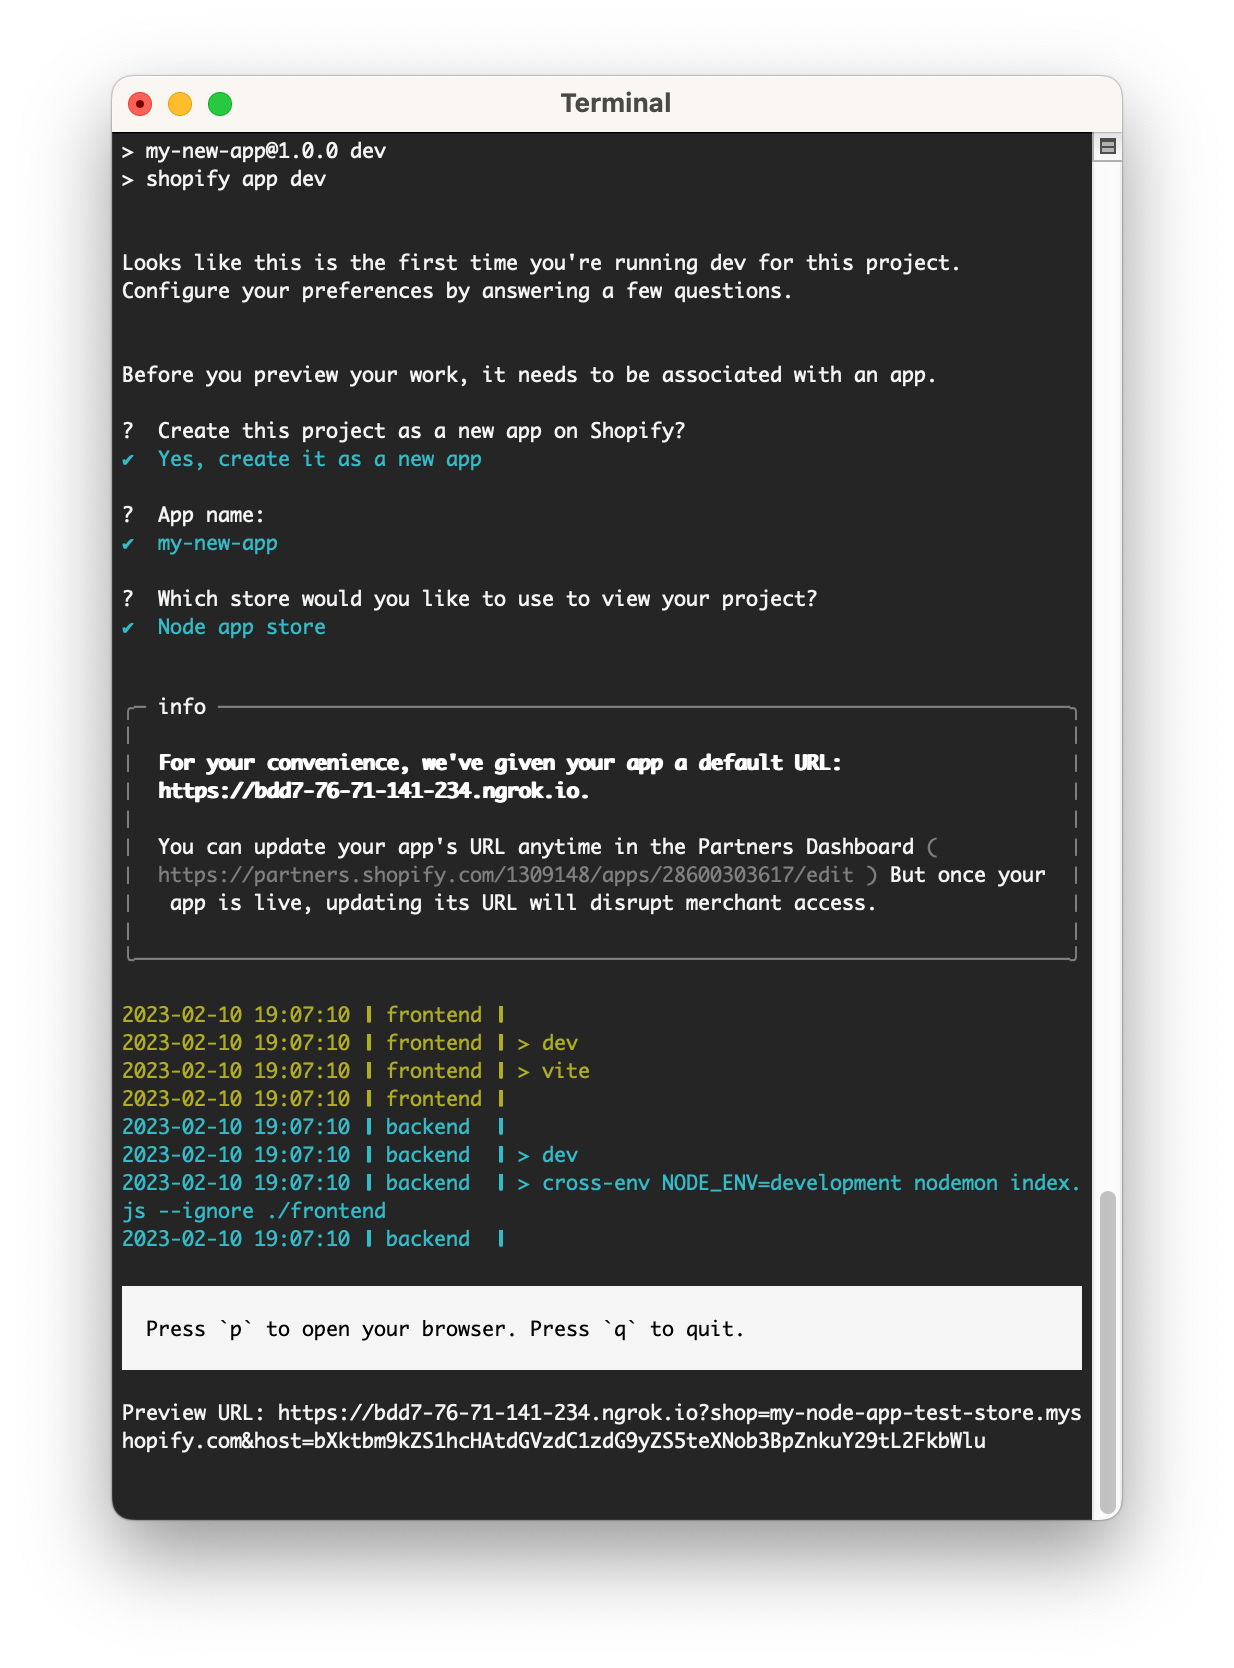
Step 3: Install your app on your development store
With the server running, press p to open your app's preview URL in a browser.
The URL follows the format https://[tunnel_url]?shop=[dev_store].myshopify.com&host=[host], where [host] is the base64-encoded host parameter used by App Bridge and represents the container of the running app.
When you open the URL, you are prompted to install the app on your development store.
Click Install app to install the app in the store.
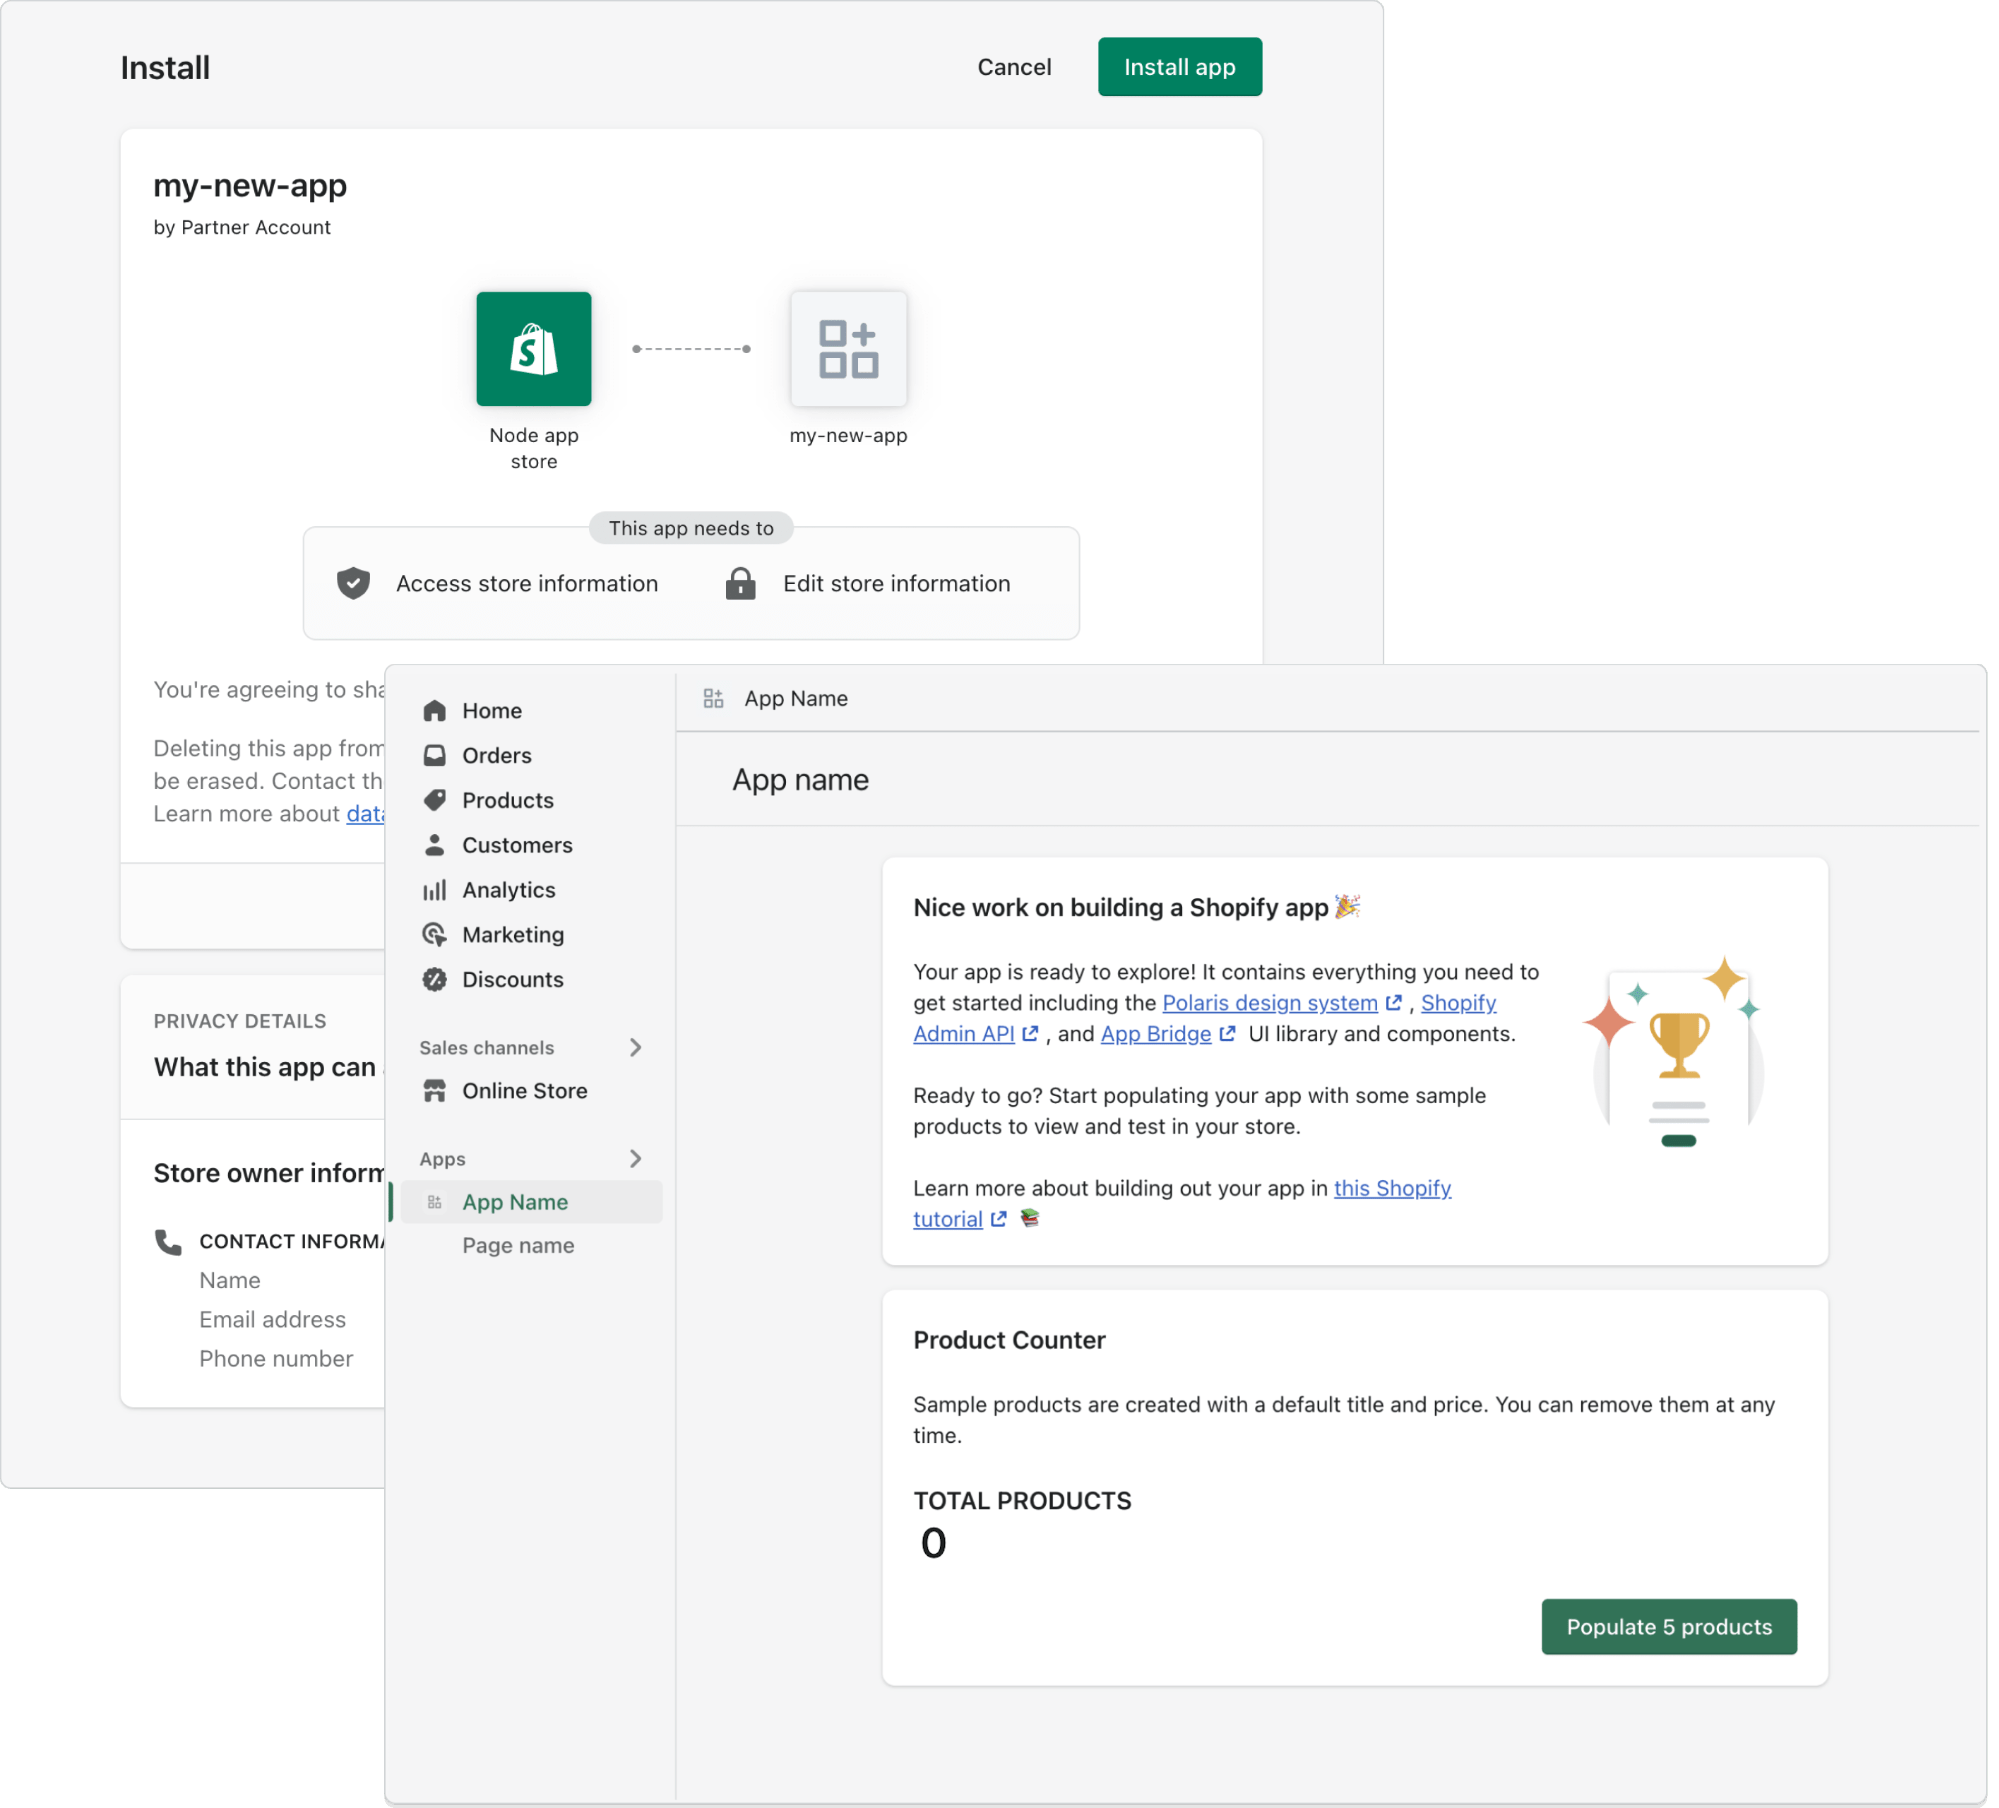
You now have a development store running with your new app installed.
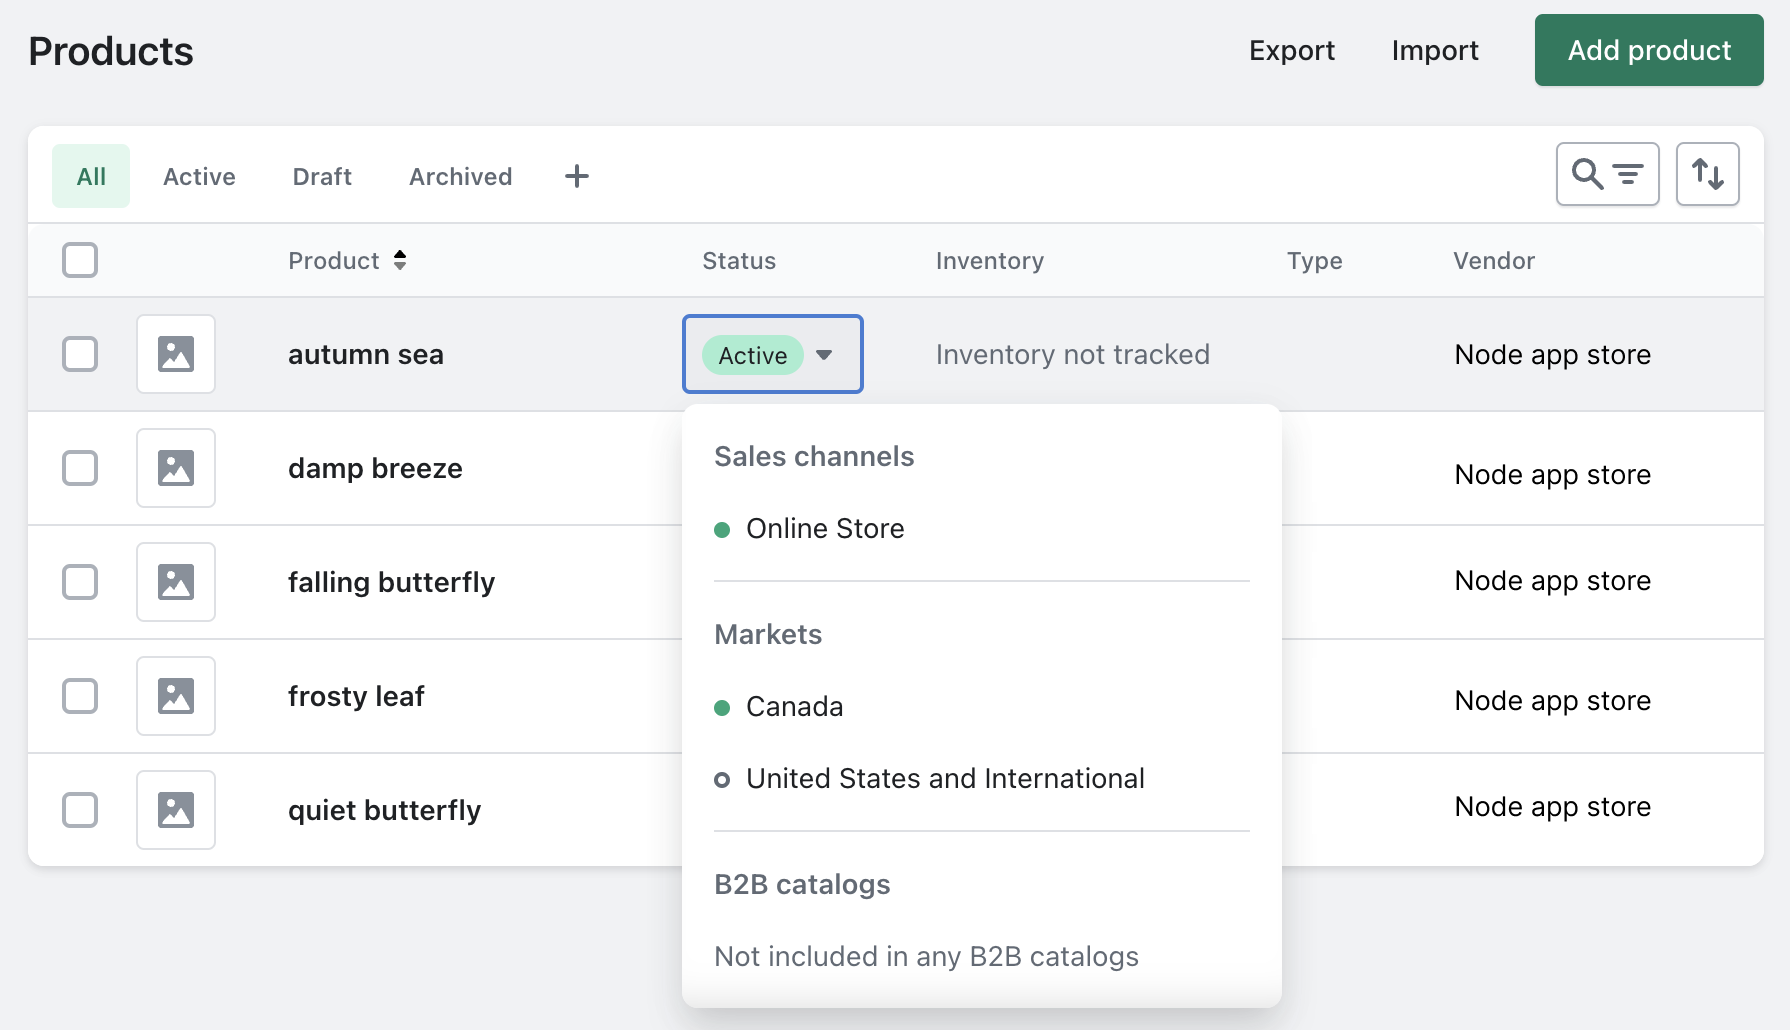
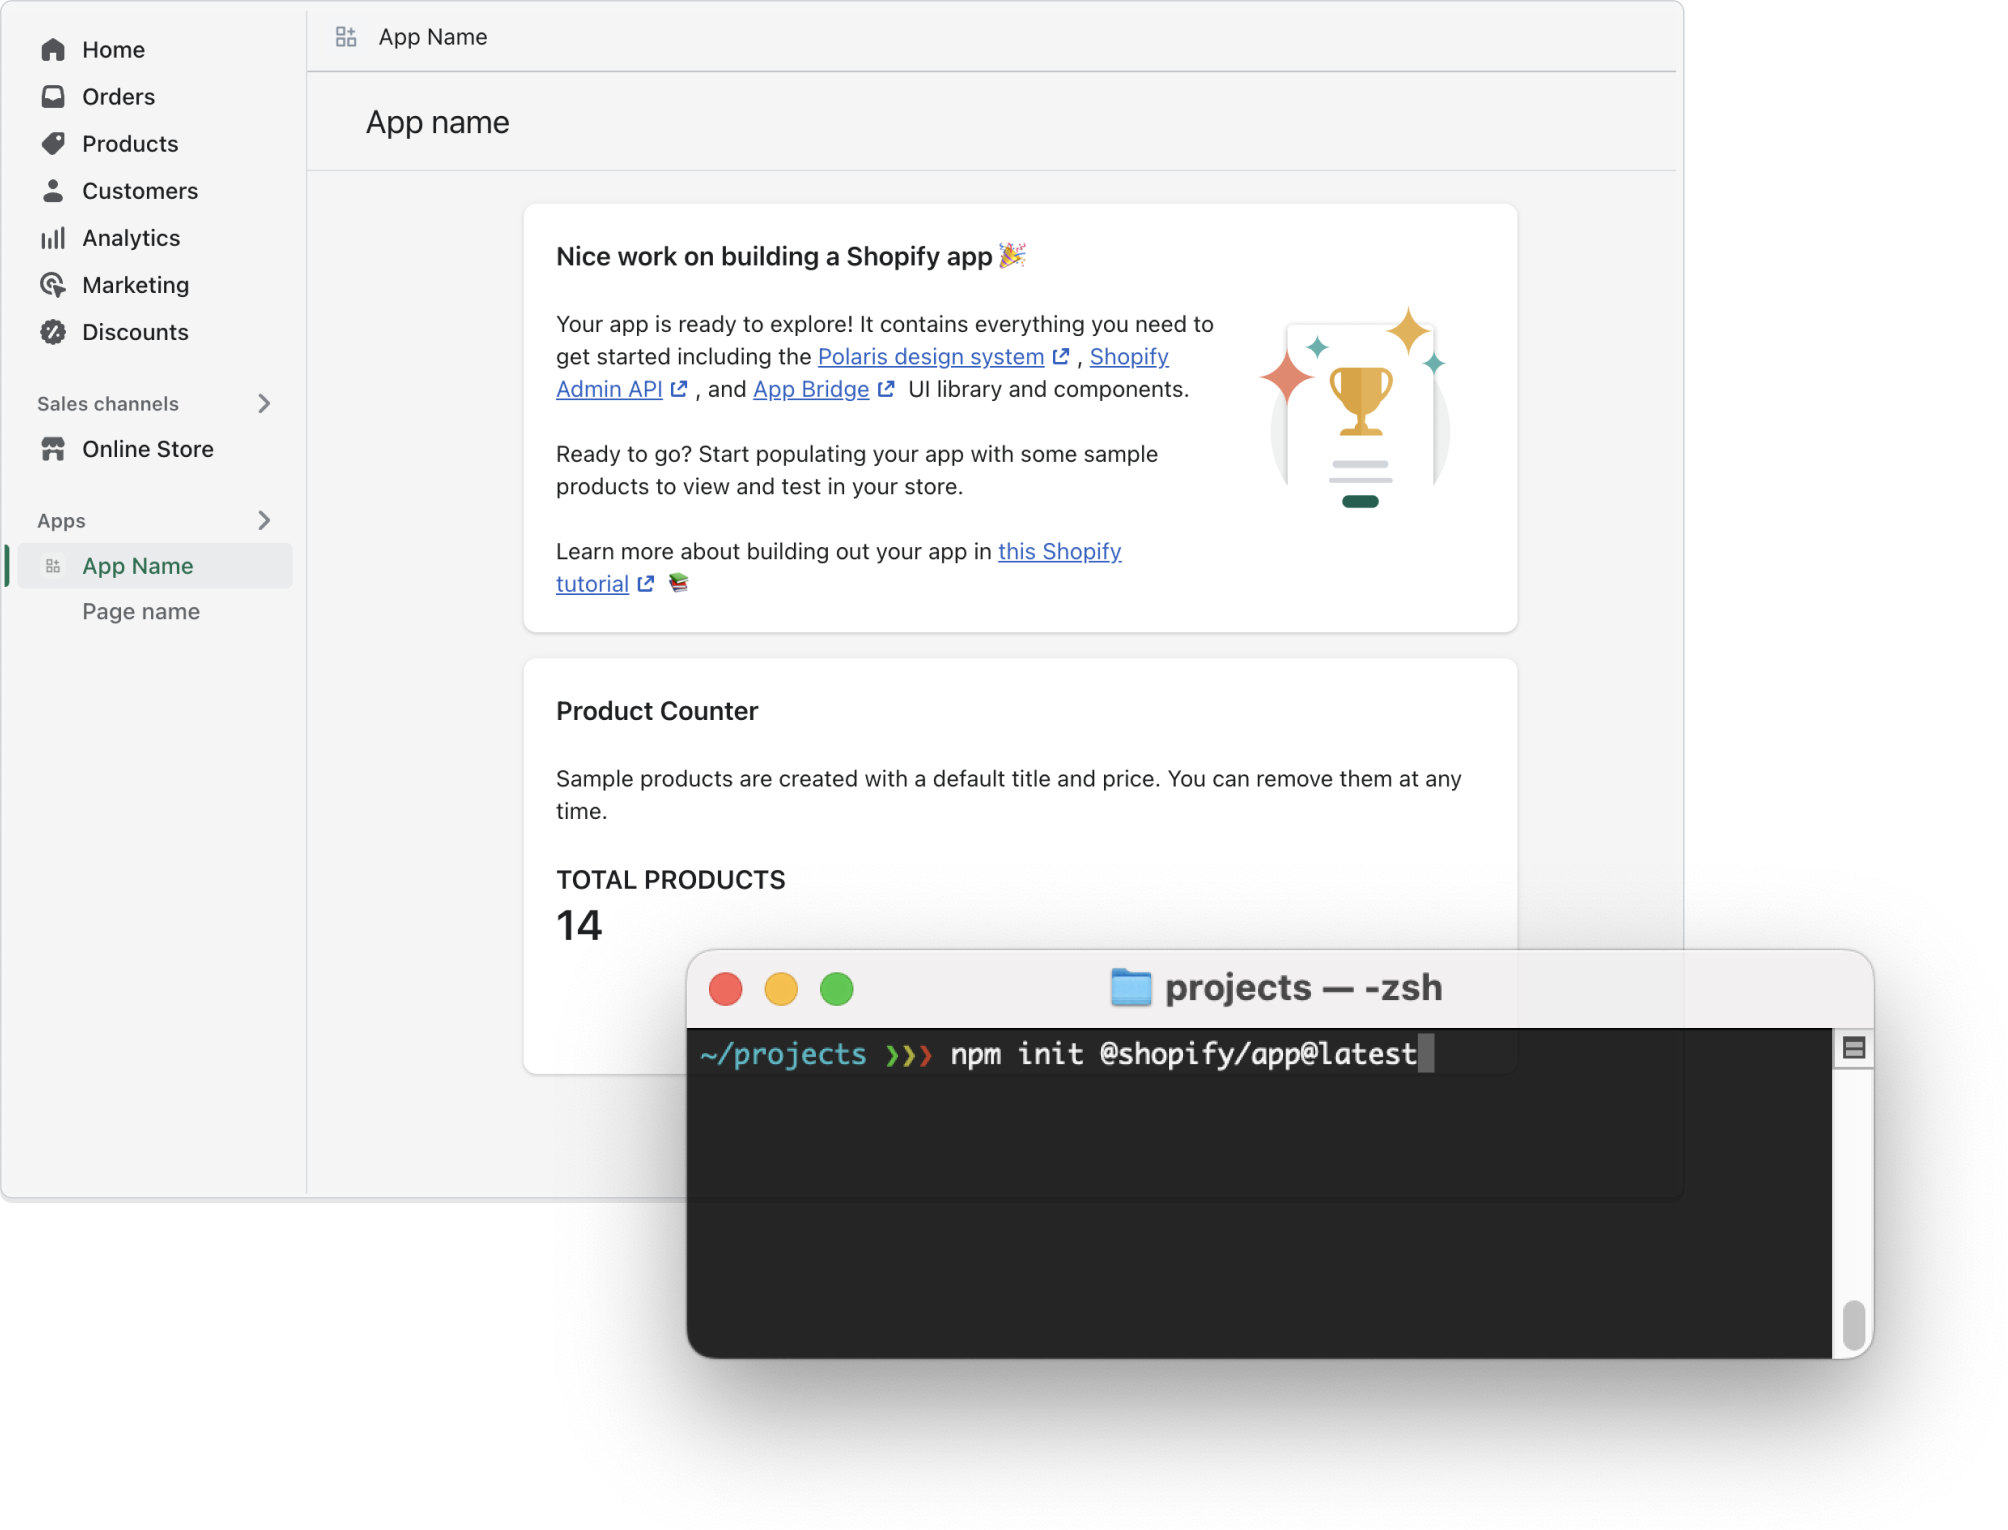
Step 4: Add and publish products to your development store for testing purposes
From the new app's home page, you can automatically populate your development store with products that you can use to test the app. You'll also need to publish the products to the online store channel so that they're available for use.
- From the home page of the app that you just created, click Populate 5 products to add products to your development store.
- From your Shopify admin interface, go to Products.
- Check the box next to each product you want to publish.
- Click ..., then click Include in sales channels.
The products you selected are now published in the online store.