REMINDER:
After seeing how to clone theme-builder and wbu-atomique in the first article, we will now focus on creating a section of our website. In this chapter, we will guide you step by step through the process of designing this section using HTML and SCSS. To follow this chapter, you must have read the previous article. If you haven't, we recommend that you read it before continuing Article1.
Here is the section we will be creating together:

We will see how to use HTML and SCSS languages on Theme Builder and WBU-Atomic to create an attractive and interactive interface. We will follow these steps to create this section :
- Step one: open the AppVuejs folder with a code editor
- Step two: setting up the structure of a theme
- Step three: importing the contents of the “js,” “scss,” and _variables files from the theme
- Step four: coding
This practical example assumes that you have already cloned theme-builder and wbu-atomique. If you have not done so yet, I recommend reading the first article in this series.
First step: open the AppVuejs folder with a code editor
Here, you need to open a code editor of your choice and create the folders needed to create the section above.
To implement this on Theme Builder, you must have a code editor (Visual Studio Code installed). If you have installed the editor, you can open it by double-clicking on it. This window will appear :
You have followed the steps to clone theme-builder and wbu-atomique into the AppVuejs folder. To open this folder with Visual Studio Code, click on the File tab, then on Open Folder. A window will appear allowing you to browse through the folders on your computer. Locate the AppVuejs folder and click on it, then click OK. You will then see the contents of the AppVuejs folder displayed in the code editor.
This window will appear.
Then click on website, then on the AppVuejs folder, and finally press the open button.
This is the Visual Studio Code window. You can see the files and folders for the theme-builder and wbu-atomique projects in the left pane. You can also open and edit files in the right pane. You can also use the menu bar at the top to access the various features of the code editor.
Step two: setting up the structure of a theme
To create a theme, you need to understand how theme-builder and wbu-atomique work:
- Theme-builder side
Simply go to the src folder at the root of theme-builder and create a folder containing the name of your future theme. Theme names are never separated by spaces, but rather by hyphens (-) and underscores (_).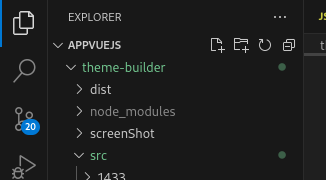
Open the src folder.
Then click on the icon to “Add a new folder as a continuation.”
So, you can name your theme. We called it “salon”![]()
After that, we will create two files inside our new folder (theme), the first one with the name of our theme and the extension “.js”. This file will be initialized in the webpack.config.js file, which is why it is crucial that it has the same name as our theme. The subfolders (js files) of our theme, which are our different sections, can be called using this file. The second one has the name of our theme, followed by the extension “.scss”, which imports the “scss” file of the theme created in wbu-atomique.

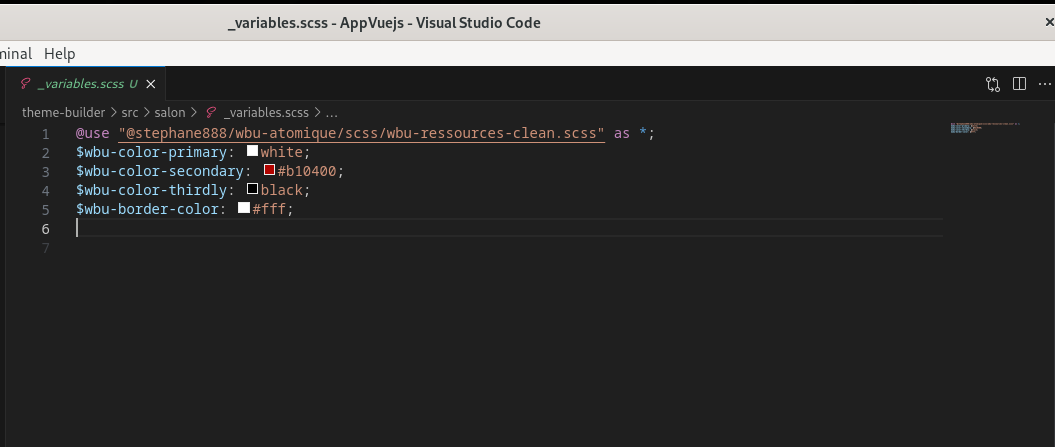
You may have noticed that the “_variables.scss” file is necessary for importing or storing your variables, such as colors.
We will create a subfolder (section) to represent a part of our theme (for example: “FirstSection”) in our theme. We will create three files within this section. :

- The first file is called: First.html. It will contain the HTML code for our section, but without the HTML document header or the body tag, as these are generated automatically in the webpack.config.js file.
- The next file is named after our subfolder, e.g., first.scss, which allows us to import the _Variables.scss file and the scss file(s) contained in our theme folder.
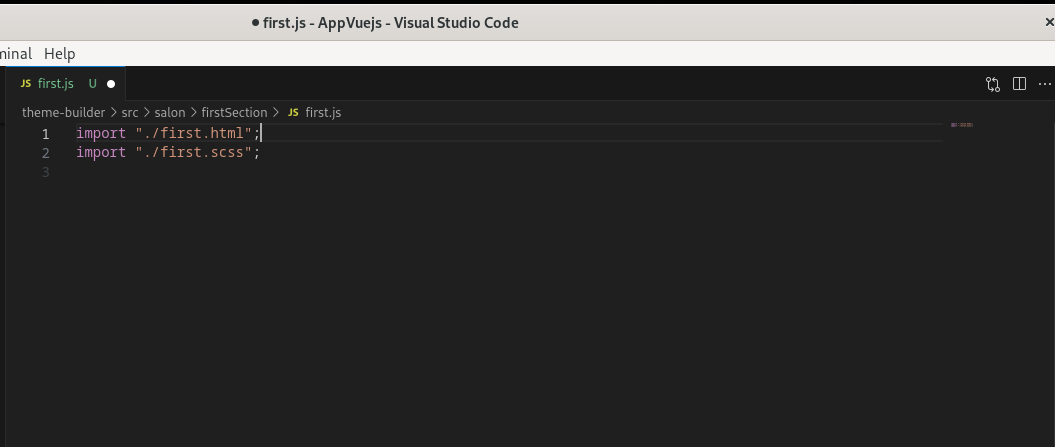
- The third file is a js file called: "first.js. It will import the (html) file and (scss) file from our section.
2.wbu-atomique side
ISimply go to the “wbu-atomique/scss/organisme/sections/theme_builder” folder and create a folder with the name of our theme. The .scss files for each section of your theme will be stored in this folder, allowing you to create the scss code you want. The .js files are located in the “js” folder at the root of wbu-atomique.

step three: import the contents of the "js", "scss" and _variables files of the theme
Let's see how to proceed. to begin importing the contents of the files, you'll need to create them for this purpose, see the "first" part of this article. the different files created, start with :
In our theme's .js file (salon), named salon.js, import as follows:
This image shows how the JavaScript and Sass files required for the "salon" theme are imported. The first line imports the Bootstrap JavaScript file, a framework that facilitates the creation of responsive and dynamic web interfaces. The second line imports the theme's Sass file "salon.scss", which contains the theme's styles. The third line imports the JavaScript file for the "firstSection.js" section, which contains the code specific to this part of the site. These files are located in the "salon" folder.
Next we move on to the salon.scss file
, which imports the saas files contained in wbu-atomique and the _variables file.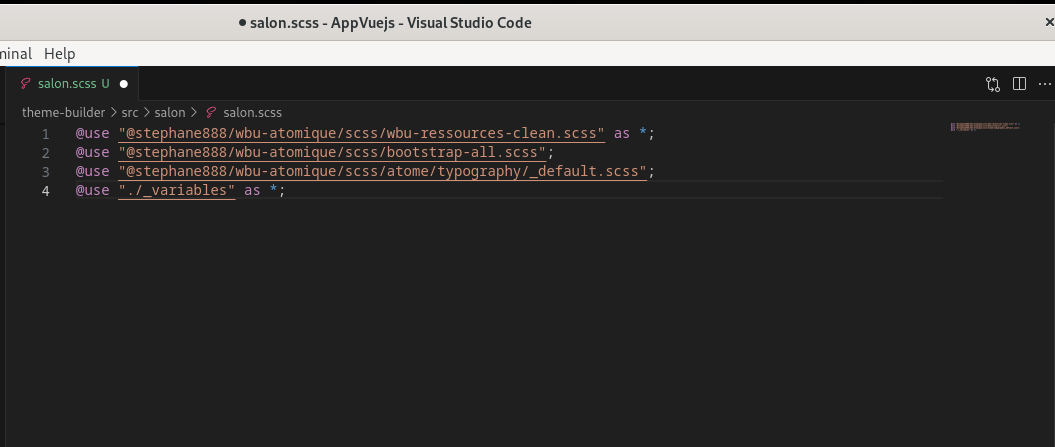
Let's finish with the _variable.scss file, which contains the various variables predefined in wbu-atomique This file is a Sass file, a language that makes creating scss stylesheets easier and more efficient. Variables are elements that store values, such as colors, sizes, fonts and so on. They allow these values to be reused throughout the code, and easily modified if necessary. For example, you can define a variable for the theme's main color, and use it in all elements that must have this color.
Let's continue by importing the files for the “firstSection” section of the “salon” theme. The section's JavaScript file (first.js) imports both the section's HTML and Sass files.
To do this, we need to go to wbu-atomic/scss/organism/sections/theme-builder and create a folder with the same name as the theme contained in theme-builder.
![]()
Next, create a “.scss” file and import it into the “.scss” file in the theme-builder section.
in the .scss file contained in wbu-atomique you could insert your style.
So, once we've created the folder, we can go back to the theme-builder folder, into the “.scss” file in the section (first.scss) and import the file we've created in wbu-atomique.

Fourth step:coding
- theme-builder side
open the file first.html, enter the “HTML” code corresponding to the section you want to create (without the header and body tags), save the file “first.html”.
<section class="page-header">
   <div class="container">
        <div class="row ">
            <div class="col-md-6">
                <h1 class="font-weight-bold ">
                    Recherchez  les données  ouvertes de l administration publique de suisse
                </h1>
                <a class="btn btn-default-inverted" href="#" role="button">
                    En savoir plus sur opendata.swiss
                </a>
            </div>
            <div class="col-md-offset-1  col-md-5 text-md-right text-xs-center">
                <div class="page-right">
                    <div class="wbu-titre-suppra">10 328</div>
                    <div class="title">jeux de données</div>
                    <form action="#" role="search">
                        <div class="form-group">
                            <input id="search" type="search" class="form-control input" name="q" placeholder="Rechercher les jeux de données..." autocomplete="off">
                            <i class="fa fa-search form-control-feedback" aria-hidden="true"></i>
                       </div>
                    </form>
                </div>

               <p><a href="#">accédez au catalogue de données en utilisant l'API</a></p>

            </div>
        </div>
    </div>

</section>
Save your document (Ctrl + S). Here's an example of code that illustrates the structure of the HTML file. I invite you to use your knowledge of HTML to code this section.
Before continuing, let's take a closer look at this code fragment to better understand how it works:
Note:
Before coding our .scss section, let's take a moment to understand the _variables.scss file and the role of variables. Variables are overloaded at theme-builder level in the _variables.scss file.
- the role?
Let me explain why:
When we're coding a website, we may have a style that's repeated several times, and sometimes we have to manage a large number of lines of code. If we want to change a color that appears often, we have to search for all occurrences of that color, which is very tedious. That's why wbu-atomique simplifies the task by offering a number of predefined styles. Here's a page showing the variables to be used:
$wbu- (the mandatory prefix for the declaration of a variable). For example, $wbu-background to designate the background color. In short, there are variables already defined by default for certain parts.
o view your rendering in the browser, you'll need to select the theme to be used by going to the webpack.config.js file at the base of the theme-builder folder. In the constant entitled “const CurrentThemeName = ”theme to display", you'll need to select the theme you wish to use by modifying the value of the constant with the name of the desired theme.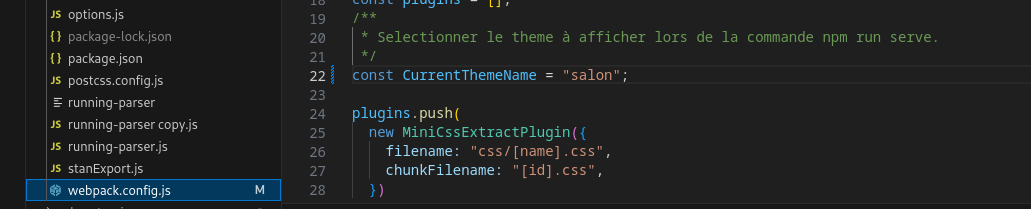
then to launch the server, on the editor toolbar, open a new terminal by clicking on “Terminal” and then on “New terminal” in the code editor toolbar:
Once the terminal is open, access the root of the machine using the command :
cd /use this command to access the siteweb folder:
cd sitewebthen position yourself on the AppVuejs folder, using this command:
cd AppVuejsthen access the theme-builder folder with the command:
cd theme-builderthen enter the command:
npm run servefinally, copy or press Ctrl and right-click on one of the addresses displayed on the terminal.
You can view the result in the browser.
We've completed the HTML part of our section. Now it's time to move on to the saas style.
- wbu-atomic side
open the file first.scss created in "/wbu-atomique/scss/organisme/sections/theme_builder/salon and insert your sass code:
@use "../../../../variables" as*;
@use "./../../../../wbu-ressources-clean.scss" as *;


.page-header {
    color: $wbu-color-primary;
    background-color:$wbu-background ;
    margin-top: 0;
    margin-bottom: $wbu-margin * 2.9;
    padding: $wbu-padding 0;
    border: 0;
    word-wrap: break-word;


    .container {
        padding-top: $wbu-padding * 2.7;
        padding-bottom:$wbu-padding * 3.7;
        background: url('https://opendata.swiss/images/swiss_map.png');
        background-repeat: no-repeat;
        background-size: contain;
        background-position: right;


        a.btn {
            color: $wbu-color-primary;;
            border: 1px solid $wbu-border-color;


            &:hover {
               background-color:#045a51 ;

            }
        }


        .page-right  {


            .title {
                font-weight: $wbu-title-font-weight;


            }
     }


        .form-control{

           height:$wbu-default-line-height * 50;
           border: 1px solid black;

        }

        p a{
            color: $wbu-color-primary;;


            &:hover {
               text-decoration: none;
               color: $wbu-color-secondary;
            }

        }


    }


}
and if we look again at the file (_variables.scss in our section)

you can see the different overridden variables we've used.
Best practices
- it's best to apply margin-bottom to sections.
- Don't use p tags when coding sections.
- Each section must begin with the “section” tag, which must have the “space_bottom” class.
- Container is followed by a div tag, which can have the classes “container, container-fluid, width-tablet, width-phone, ... or empty”.